 She's Alive!!!!!!
I started with 1 rusted but decently taken care
of
running '73, bought a totally rusted, not running '73, and started from
there.
The running one I had already outfitted the year
prior
with a 14bolt FF axle, 2.5 Skyjacker lift.
It came from the factory with an SM465 Manual
Transmission
coupled to a NP205 all gear transfercase.
The engine had over 200,000mi on it, and had been
rebuilt once with a top-half rebuild after that, so I retired (sold) it.
Here is my master plan:
To meet the goals here's the template I came up with:Goal #1: Off-Road Capability. Michigan area, mostly mud, sand. Some light rock crawling. Goal #2: Street Drivable on a semi-daily basis. Goal #3: Make as RustProof as possible! Goal #4: Keep as original looking as possible. I'm not much for gaudyness, and I like the OEM look.
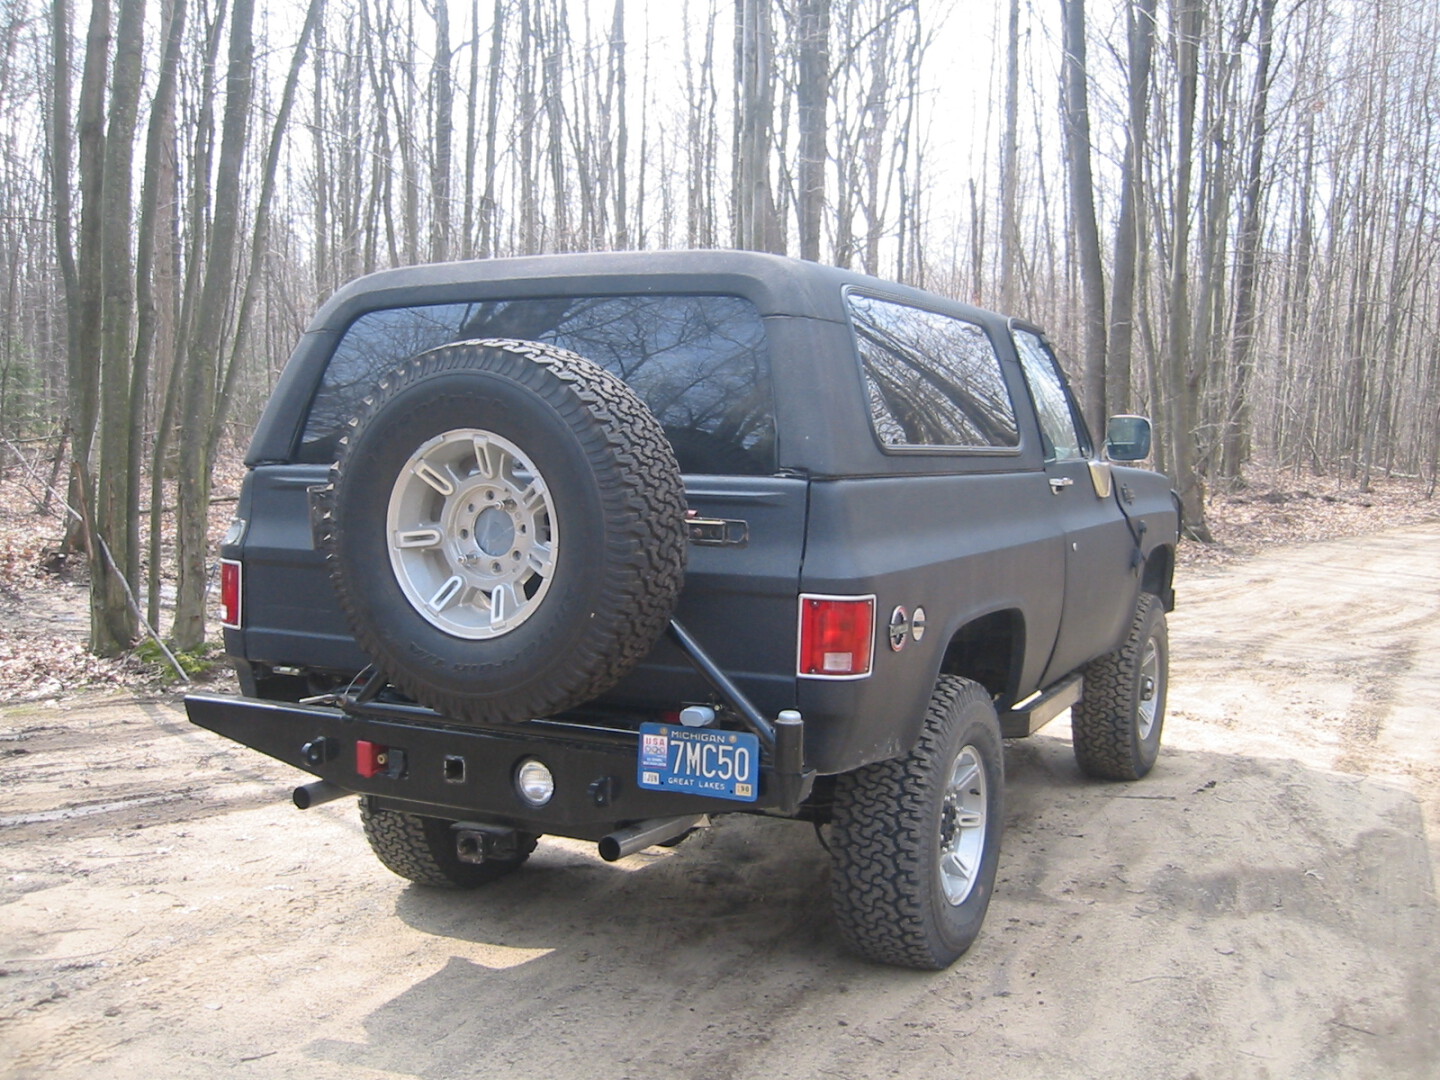
- 1973 Chevrolet Blazer
- Full Fiberglass body with 8 point roll cage to frame
- Chevy Small Block 383 Stroker. (GM Goodwrench HT 383) -
Redecided on RamJet 350 Crate Engine
- Keep the SM465 Manual Transmission and NP205 Transfer Case
- 2.5" Spring Lift
- Overall .5" Body lift.
- 35" Tires (Don't worry, with the weight savings of the Glass body, these will clear no problem!)
- 3.73 Gears
- Dana 44 Front, ARB'd
- 14 Bolt Full Floater Rear with Detroit
- Converted AC Compressor to Air Compressor
- Line-X Entire body, inside and out(Ok, I added this one!)
Here's what I've done thus far (22May2012):
Torn down both trucks.
Frame:
- Sandblasted the best frame
- Re-inforced the frame in the typicaly vunerable Chevy truck frame areas: Rear shock mounts, steering gear mount.
- Painted the frame with DuPont Imron.
Drivetrain & Chassis:
- Rebuilt both axles, Rear is a 14Bolt FF, front is a Dana 44 converted to 3/4 ton. Added Detroit Locker to rear and ARB Air locker to the front.
- Had my 50gallon fuel tank "Renu"'d. (cleaned, checked, and dunked in some type of expoxy to coat inside & out)
- Rebuilt the SM465 Transmission and NP205 Transfer case. All they really needed were new bearings and seals, and 1 shift fork.
- Purchased H2 tires/wheels. Installed with .25" wheel spacers to clear the tie-rod ends and to make up for the increased backspacing of the H2 wheel.
- Installed sealed vent tubing for both axles, transmission & transfercase to be vented up high somewhere in the engine compartment.
- Installed all new Stainless steel brake/fuel lines.
- Installed Off-Road Design sway-bar disconnect.
- Installed RamJet 350 PFI Crate Engine
- Installed Serpentine Kit
- Installed the new US Body Source fiberglass body.
- Installed new Steel doors & Tailgate. (Doors were cut from template from orginal '73 doors and reinforced with the orginal '73 door reinforcements)
- Installed US Body Source one-piece Tilt Front Clip on fabbed hinges.
- Fabbed & installed 6 point full roll cage to frame, including sub-cage for mounting front seats.
- Installed all lights/grilles/bezels.
- Installed original metal dash
Heres just a sampleing of what I can remember I've done to it:
- Cut out the original dash, modify it slightly, sandblast it, paint it and install it in the fiberglass.
- Fit all the steering column/pedal reinforments and components.
- Fit the wiper motor and wipers to the fiberglass.
- Fit all the HVAC boxes on the firewall.
- Reinforce the FBHP area to accept the stock door hinges. (I ordered the orginal reinforment NOS from a dealer that had them, and used those.)
- Fit the doors and tailgate to the fiberglass openings. Each taking several days to get fit right.
- Cut out the original '73 roof rail header and fit it into the fiberglass header with stainless steel screws.
- Fit the orginal fiberglass top to the new body.
- Removed and reinstalled raditor mounts (formerly front radiator support mounts) 1" rearward to ensure radiator clearance to tilt front clip. Cut the raditor support (OEM goes whole width of vehicle) down to only the raditor section and fabbed supports from the top of it to the firewall.
I dissemembled everything and took the body for Line-x, just before christmas 2004. I got it back and started final assembly:
- Installed and bolted down entire body
- Installed roll cage
- Installed Dash
- Assembled and installed Tailgate with refurbished and/or new parts
- Assembled and installed Doors with refurbished and/or new parts
- Assembled front end pieces
- Refurbished and assembled heater box
- Created Custom Battery Tray
- Wired the truck completely from scratch using all SXL Wire. Custom winch feeds front and back, Stereo wires all encased underbody in weathertight conduit. Custom inverter/charger. 4 Speaker stereo system with 12" sub, 4 channel amp and sub amp. Sat. Radio, 6 disc changer, aux input jack. Custom Dash/gauges, Med. duty truck RPM/Fuel gauge, air gauge. Used all Potter and Brumfield aircraft circuit breakers instead of a fuse box. Used an H-Car Maxi-fuse relay center in the engine compartment. I used all sealed terminations and procured new packard terminals for the places I needed to plug into the OEM accessories, like ignition switch, wiper switch...etc. I wired up a custom 7 switch panel above the HVAC controls controlling electric fans (full on or full off or normal temp operated), front off road lights (on with high beams, on, or off), rear aux light, dome override, front/rear air lockers, OBA clutch on/off. Wiring on this truck should be bullet proof.
- Custom bent 409 stainless exhause with Dynaflow all SS mufflers.
- Reupholster '89 rear seat and installed
- Debugging runs. Coolant leak, door stiker issues, alignment, braking prop valve adjustments, and a host of other little things
What I need to do from here:
- Plumb OBA system
- Install Soft Top
- Complete right side dash (12v access outlets, sat radio and glove box)
- Redo roll cage. Front smittybilt section is too intrusive for taller drivers. Too much potential for hitting head, spine compression etc
- Remove Detroit Locker in 14BFF and install ARB Air locker
- Build lockable steel center console that can house CB, cupholder for front and rear passengers
- Repaint front bumper and rear tire carrier. I got hastly one day and painted those 2 items with something other than Imron. Surprise, it's chipping and flaking off